Key Concepts
Getting Started
QUANTCONNECT LOCAL PLATFORM
Guide through creating a project, running your first backtest, and live algo trading in QuantConnect Local Platform.
The Local Platform enables you to seamlessly develop quant strategies on-premises and in QuantConnect Cloud, getting the best of both environments. With Local Platform, you can harness your local version control, autocomplete, and coding tools with the full power of a scalable cloud at your finger tips. We intend to keep complete feature parity with our cloud environment, allowing you to harness cloud or local datasets to power on-premises quantitative research.
We encourage a hybrid “cloud + local” workflow, so you can use right tool for each stage of your development process. With the Local Platform, you can create, debug, and run projects on-premises while using your own on-site tools. With the Cloud Platform you can deploy backtests at scale and harness our massive data library at low cost.
Follow these steps to create a new trading algorithm and backtest it in QuantConnect Cloud:
2. Open![]() Visual Studio Code.
Visual Studio Code.
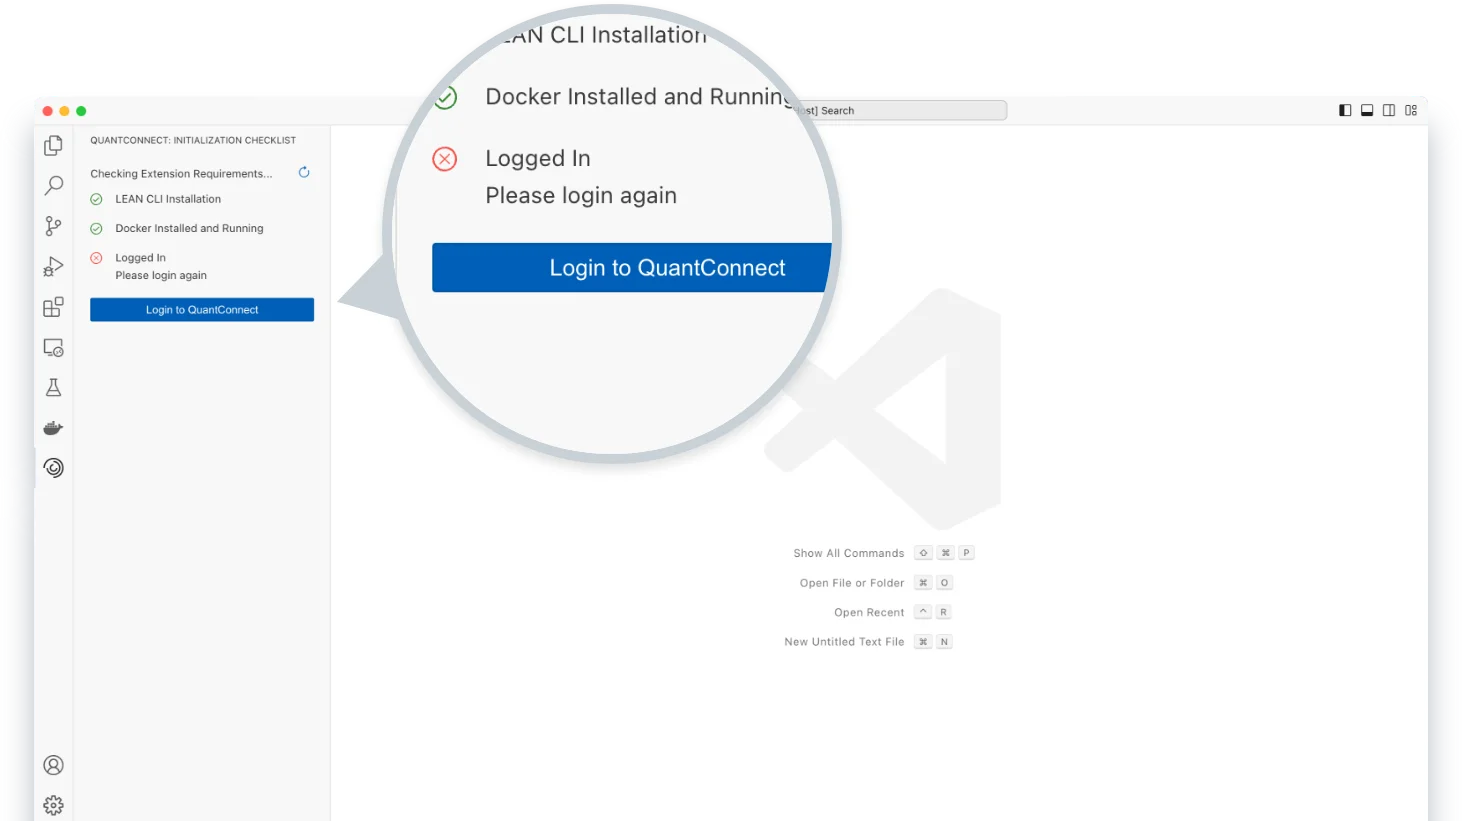
3. In the Initialization Checklist panel, click .
4. In the Visual Studio Code window, click .
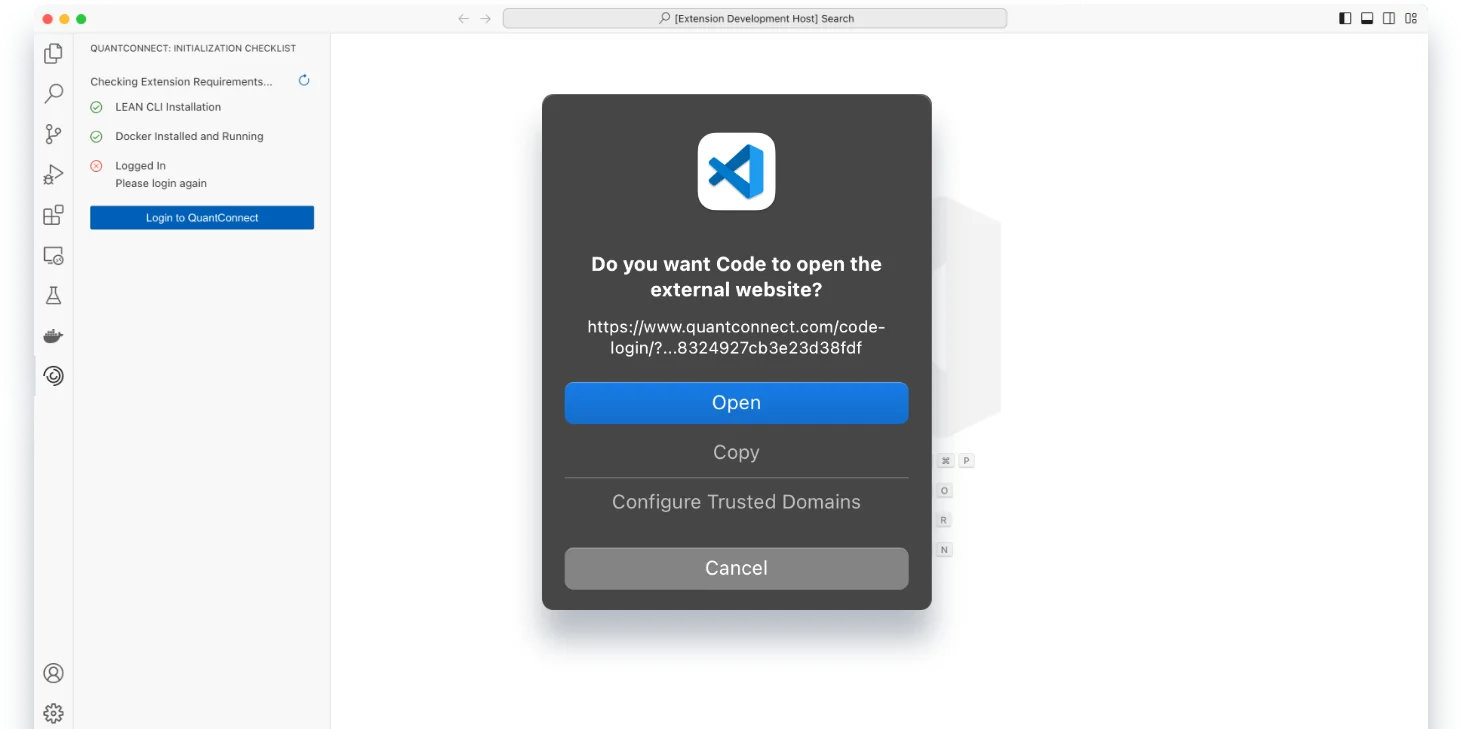
5. On the Code Extension Login page, click .
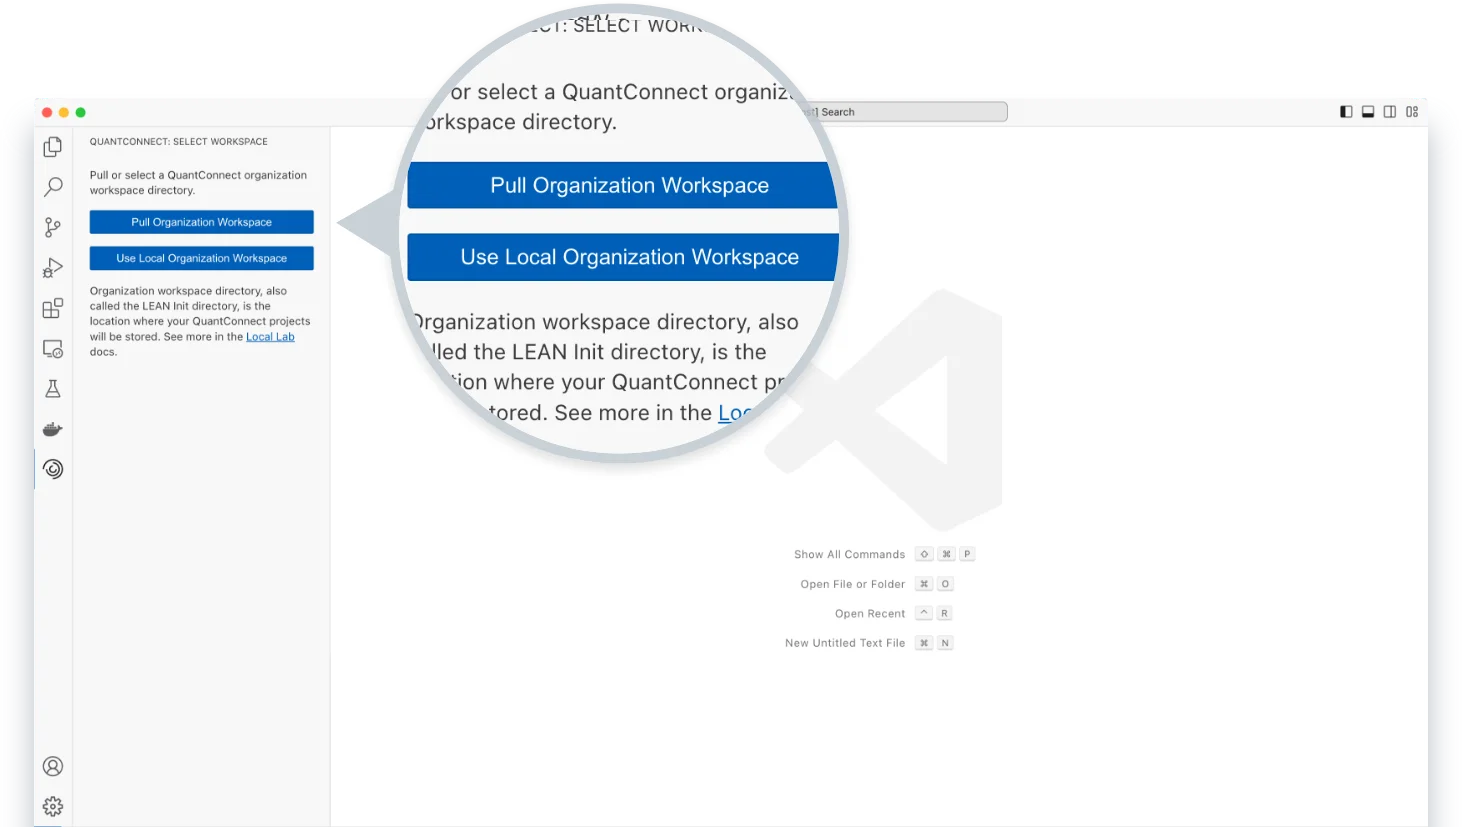
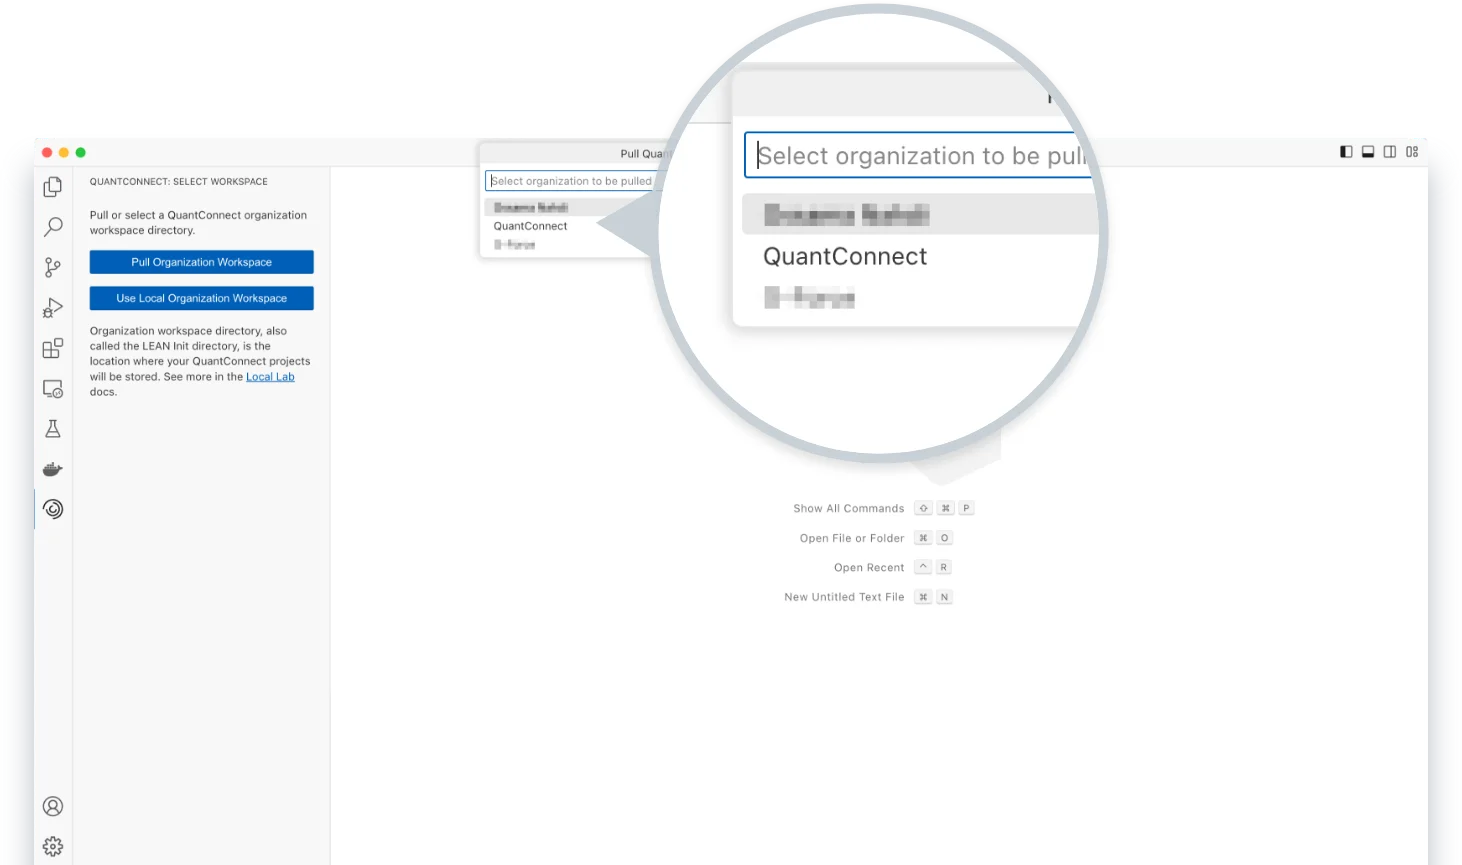
6. In VS Code, in the Select Workspace panel, click .
7. In the Pull QuantConnect Organization Workspace window, click the cloud workspace (organization) that you want to pull.
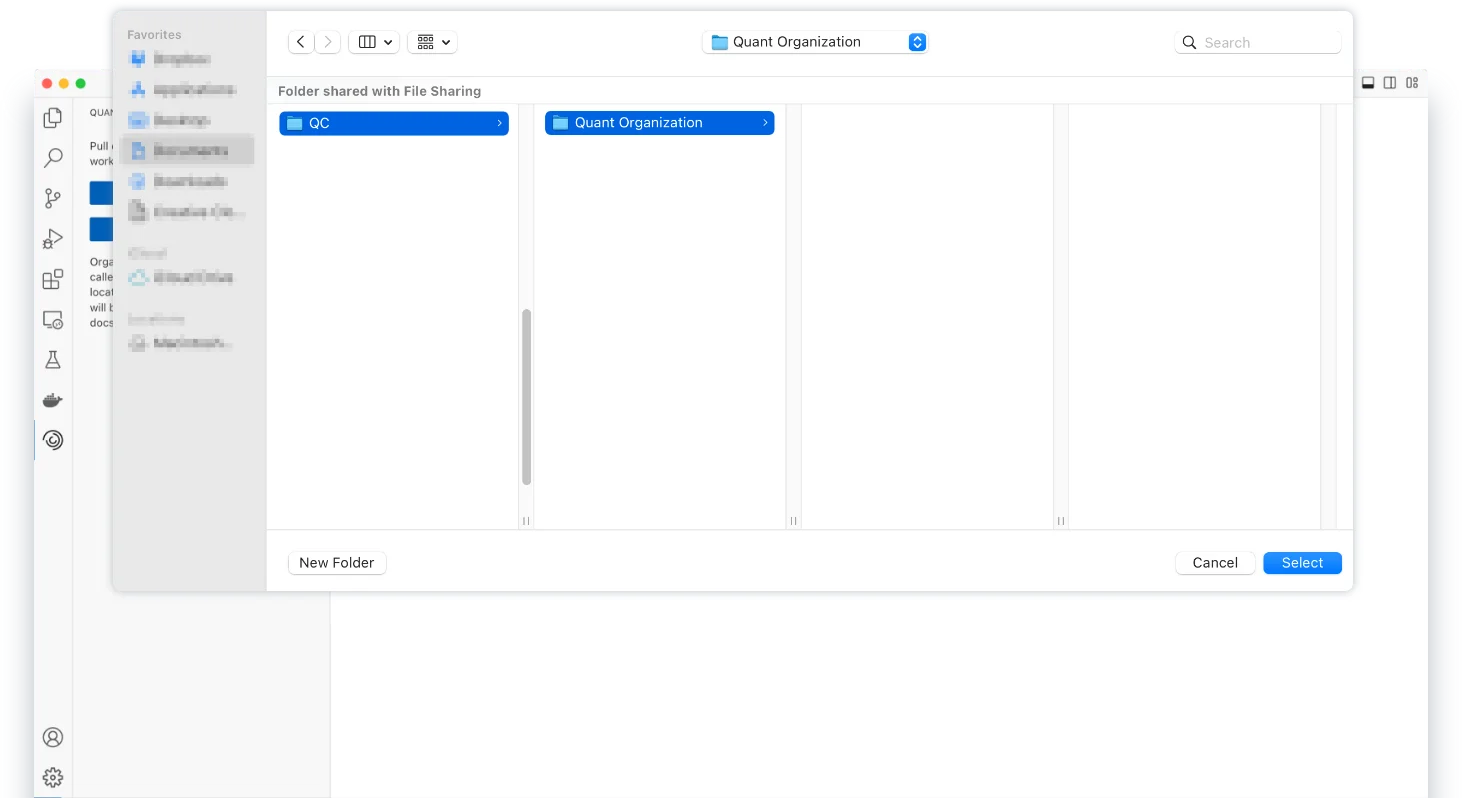
8. In the Pull QuantConnect Organization Workspace window, create a directory to serve as the organization workspace and then click .
If you are running Docker on Windows using the legacy Hyper-V backend instead of the new WSL 2 backend, you need to enable file sharing for your temporary directories and for your organization workspace. To do so, open your Docker settings, go to and add and your organization workspace path to the list. Click after making the required changes.
9. In the Open Project panel, click .
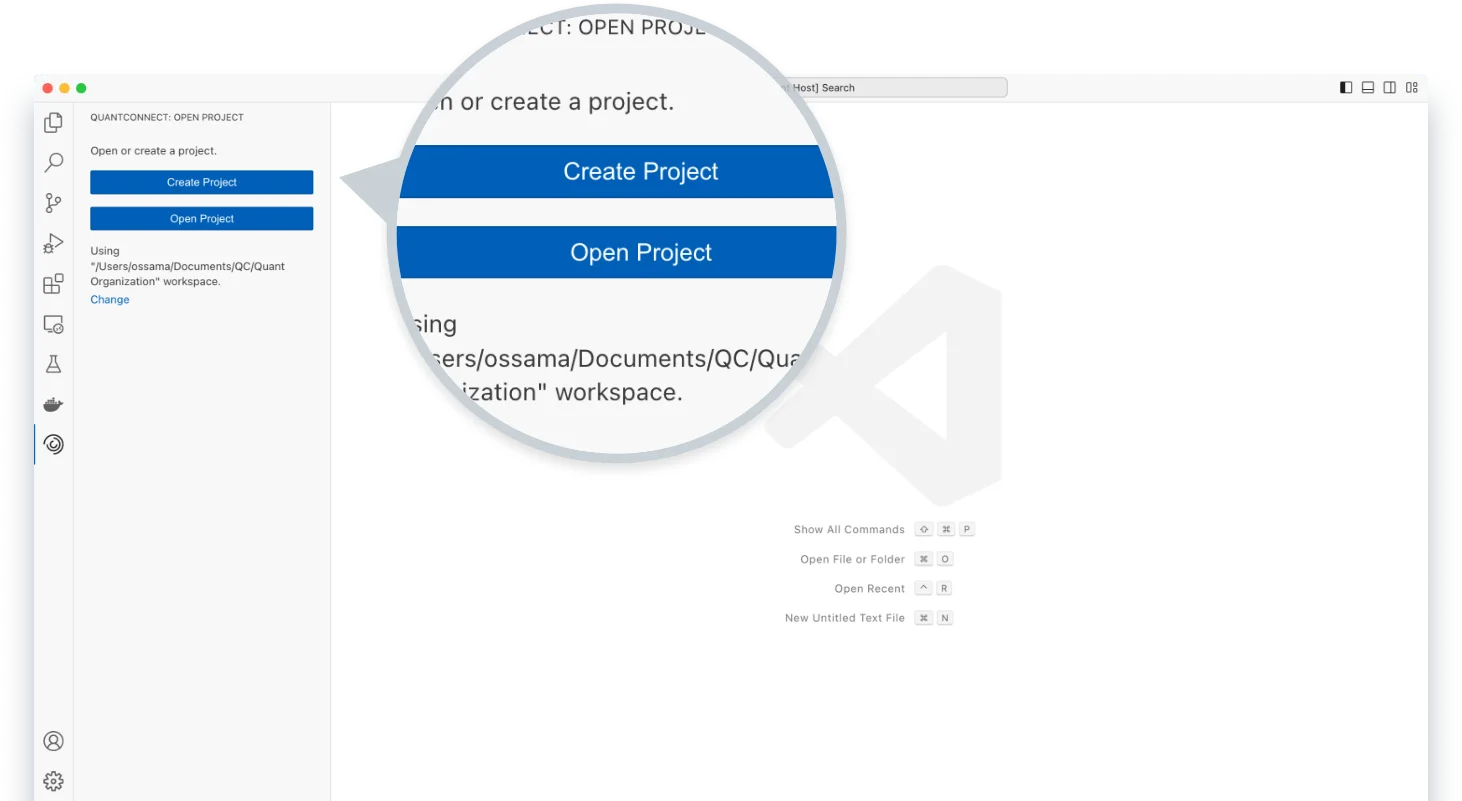
10. Enter the project name and then press .
Congratulations! You just created your first local project.

11. In the top-right corner of VS Code, click![]() and then click
and then click![]() .
.
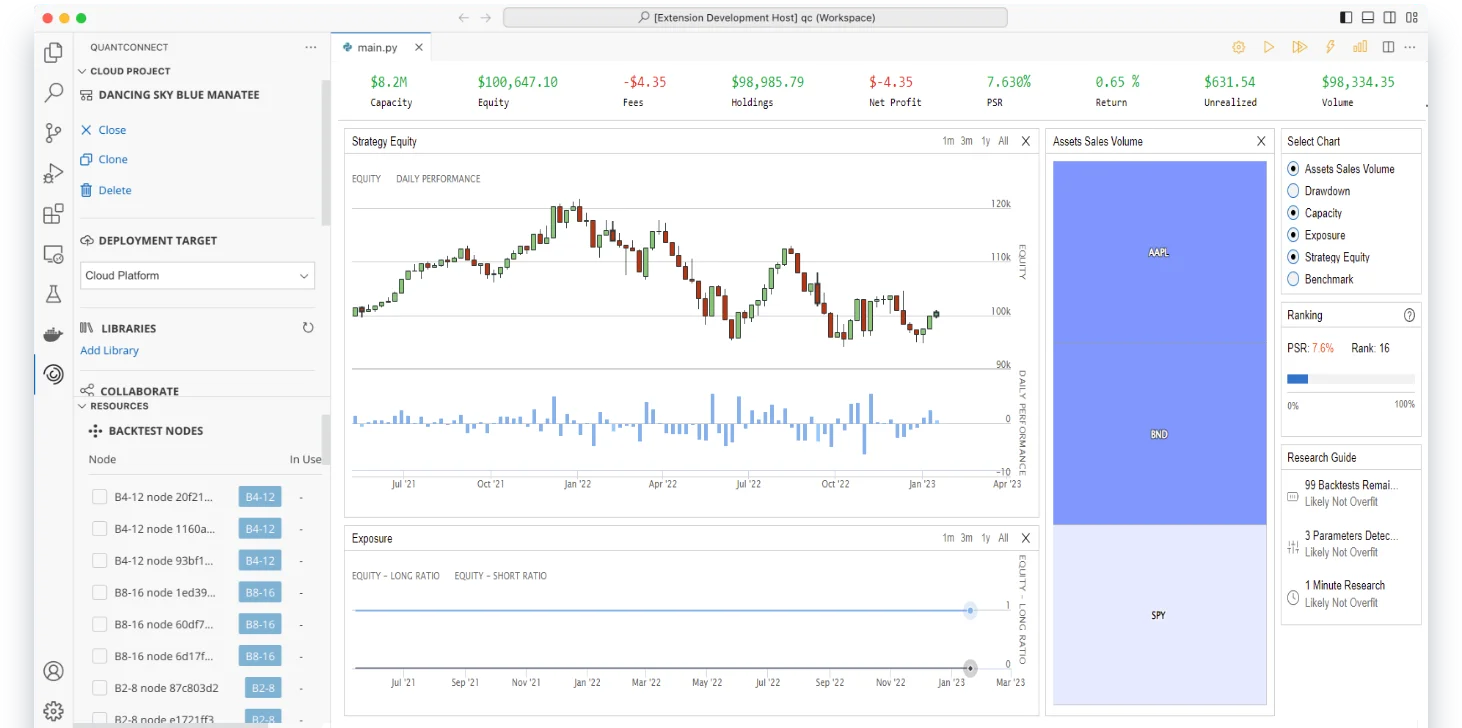
The backtest results page displays your algorithm’s performance over the backtest period.

You can also see our Videos. You can also get in touch with us via Discord.
Did you find this page helpful?