Projects
Files
Introduction
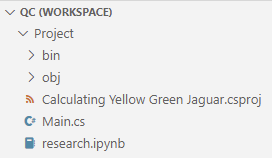
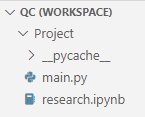
The files in your projects enable you to implement trading algorithms, perform research, and store important information. Python projects start with a main.py and a research.ipynb file. C# projects start with a Main.cs and a Research.ipynb file. Use the main.py or Main.cs file to implement trading algorithms and use the ipynb file to access the Research Environment.
Supported File Types
The Local Platform supports the following file types:
- .cs
- .ipynb
- .py
- .html
- .css
Code Files
The .py/.cs files are code files. These are the files where you implement your trading algorithm. When you backtest the project or deploy the project to live trading, the LEAN engine executes the algorithm you define in these code files.
Notebook Files
The .ipynb files are notebook files. These are the files you open when you want to access the Research Environment to perform quantitative research.
Custom Report Files
The .html/.css files are for creating custom reports.
Configuration Files
Projects also contain configuration files, which are .json files, but they aren't displayed in the Explorer panel. These files contain information like the project description, parameters, and shared libraries. For more information about project configuration files, see Configuration.
Result Files
When you run a backtest, optimize some parameters, or deploy a strategy to live trading on your local machine, the results are saved as phyical files in the project directory. Local Platform doesn't push these result files to QuantConnect Cloud.
View Files
To view the files in a project, open the project and then, in the left navigation bar, click the ![]() Explorer icon.
Explorer icon.
The QC (Workspace) section of the Explorer panel shows the files in the project.
Add Files
Follow these steps to add a file to a project:
- Open the project.
- In the left navigation menu, click the
 Explorer icon.
 - In the Explorer panel, expand the section.
- Click the
 New File icon.
 - Enter a file name and extension.
- Press Enter.
Add Directories
You can organize the code and notebook files in your project into directories to make navigating them easier. For example, if you have multiple Alpha models in your strategy, you can create an alphas directory in your project to hold a file for each Alpha model.
Follow these steps to add a directory to a project:
- Open the project.
- In the left navigation menu, click the Explorer icon.
- In the Explorer panel, expand the section.
- Click the
 New Directory icon.
 - Enter a directory name and then press Enter.
The following directory names are reserved: .ipynb_checkpoints, .idea, .vscode, __pycache__, bin, obj, backtests, live, optimizations, storage, and report.
Open Files
Follow these steps to open a file in a project:
- Open the project.
- In the left navigation menu, click the Explorer icon.
- In the Explorer panel, click the file you want to open.
Rename Files and Directories
Follow these steps to rename a file or directory in a project:
- Open the project.
- In the left navigation menu, click the Explorer icon.
- In the Explorer panel, right-click the file or directory you want to rename and then click .
- Enter the new name and then press .
The following directory names are reserved: .ipynb_checkpoints, .idea, .vscode, __pycache__, bin, obj, backtests, live, optimizations, storage, and report.
Delete Files and Directories
Follow these steps to delete a file or directory in a project:
- Open the project.
- In the left navigation menu, click the Explorer icon.
- In the Explorer panel, right-click the file or directory you want to delete and then click .
- Click .
You can also see our Videos. You can also get in touch with us via Discord.
Did you find this page helpful?