Projects
IDE
Introduction
The web Integrated Development Environment (IDE) lets you work on research notebooks and develop algorithms for backtesting and live trading. When you open a project, the IDE automatically displays. You can access your trading algorithms from anywhere in the world with just an internet connection and a browser. If you prefer to use a different IDE, the CLI allows you to develop locally in your preferred IDE.
Supported Languages
The Lean engine supports C# and Python. Python is less verbose, has more third-party libraries, and is more popular among the QuantConnect community than C#. C# is faster than Python and it's easier to contribute to Lean if you have features written in C# modules. Python is also the native language for the research notebooks, so it's easier to use in the Research Environment.
The programming language that you have set on your account determines how autocomplete and IntelliSense are verified and determines the types of files that are included in your new projects. If you have Python set as your programming language, new projects will have .py files. If you have C# set as your programming language, new projects will have .cs files.
Autocomplete and Intellisense
Intellisense is a GUI tool in your code files that shows auto-completion options and presents the members that are accessible from the current object. The tool works by searching for the statement that you're typing, given the context. You can use Intellisense to auto-complete method names and object attributes. When you use it, a pop-up displays in the IDE with the following information:
- Member type
- Member description
- The parameters that the method accepts (if the member is a method)
Use Intellisense to speed up your algorithm development. It works with all of the default class members in Lean, but it doesn't currently support class names or user-defined objects.
Use Autocomplete
Follow these steps to use autocomplete:
- Open a project.
- Type the first few characters of a variable, function, class, or class member that you want to autocomplete (for example,
self.setSetorSimpleMovingAverage.Upda). - Press CTRL+Space.
- Select the class member that you want to autocomplete.
If there are class members that match the characters you provided, a list of class members displays.
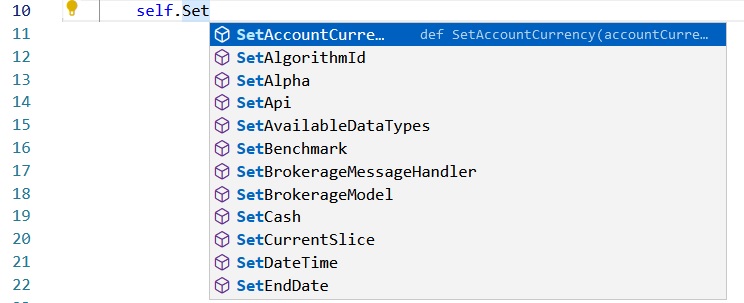
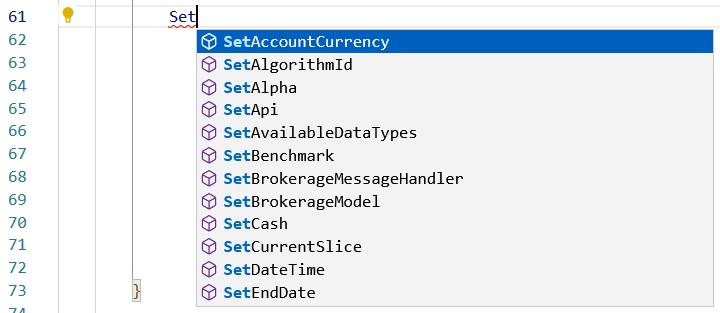
The rest of the class member name is automatically written in the code file.
Console
The console panel at the bottom of the IDE provides some helpful information while you're developing algorithms.
Cloud Terminal
The Cloud Terminal tab of the panel shows the API messages, errors, and the logs from your algorithms.

To clear the Cloud Terminal, click the icon in the top-right corner of the panel.
Ask Mia
The Ask Mia tab of the panel is where you can interact with our AI assistant, Mia.
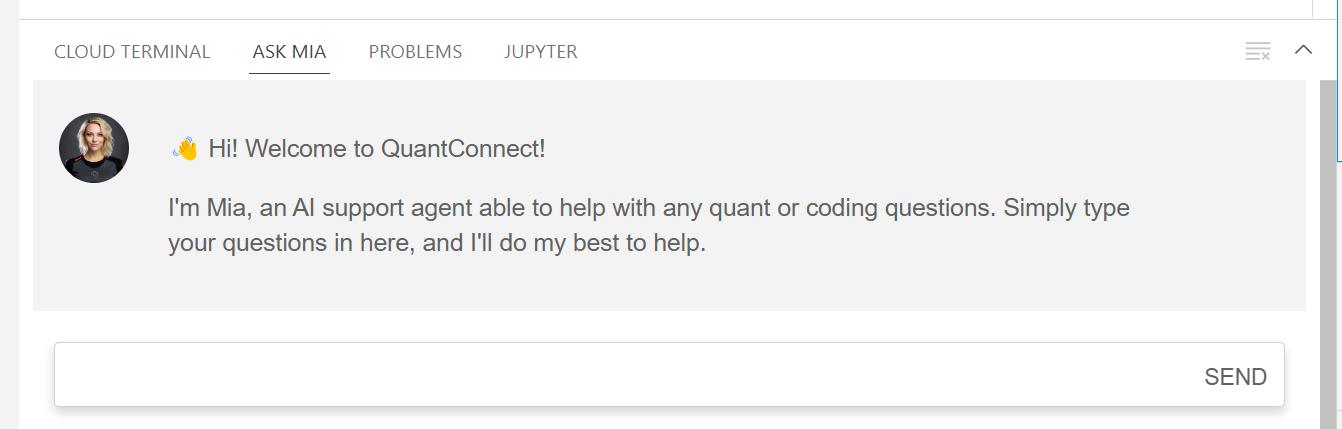
Mia provides contextual assistance to most issues you may encounter when developing a strategy, including build errors, API methods, and best coding practices. It has been trained on hundreds of algorithms and thousands of documentation pages.
To clear the chat with Mia, click the icon in the top-right corner of the panel.
Problems
The Problems tab of the panel highlights the coding errors in your algorithms.


Manage Nodes
The Resources panel shows the cloud backtesting, research, and live trading nodes within your organization.
To view the Resources panel, open a project and then, in the right navigation menu, click the ![]() Resources icon.
Resources icon.
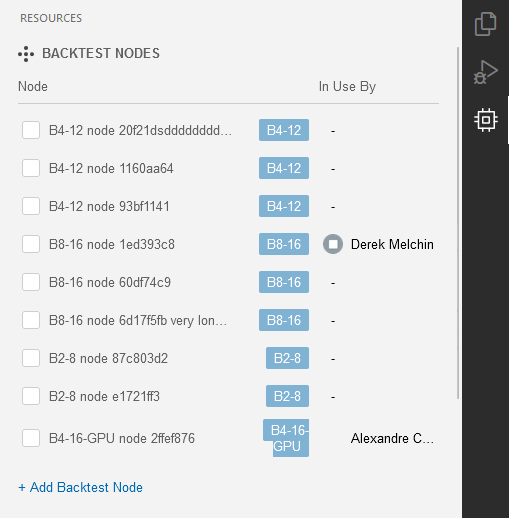
The panel displays the following information for each node:
| Column | Description |
|---|---|
| Node | The node name and model. |
| In Use By | The owner and name of the project using the node. |
To stop a running node, click the button next to it. You can stop nodes that you are using, but you need stop node permissions to stop nodes other members are using.
By default, we select the best node available in your clusters when you launch a backtest or research notebook. To use a specific node, click the check box next to a node in the panel.
Navigate the File Outline
The Outline section in the Explorer panel is an easy way to navigate your files. The section shows the name of classes, members, and functions defined throughout the file. Click one of the names to jump your cursor to the respective definition in the file. To view the Outline, open a project and then, in the right navigation menu, click the ![]() Explorer icon.
Explorer icon.
Split the Editor
The editor can split horizontally and vertically to display multiple files at once. Follow these steps to split the editor:
- Open a project.
- In the right navigation bar, click the
 Explorer icon.
 - In the QC (Workspace) section, drag and drop the files you want to open.
Use this feature instead of opening multiple browser tabs for a single project. If you open open multiple browser tabs, two code sessions will be updating the same project, which will cause the code sessions to fall out of sync.
Show and Hide Code Blocks
The editor can hide and show code blocks to make navigating files easier. To hide and show code blocks, open a project and then click the arrow icon next to a line number.
Keyboard Shortcuts
Keyboard shortcuts are combinations of keys that you can issue to manipulate the IDE. They can speed up your workflow because they remove the need for you to reach for your mouse.
Follow these steps to view the keyboard shortcuts of your account:
- Open a project.
- Press F1.
- Enter "Preferences: Open Keyboard Shortcuts".
- Click .
To set a key binding for a command, click the pencil icon in the left column of the keyboard shortcuts table, enter the key combination, and then press Enter.
Supported Browsers
The IDE works with Chrome, Edge, Firefox, and Safari. For more information about browser support, see Browser Support in the Visual Studio Code documentation.
Cookies
You need third-party cookies enabled on your browser to use the IDE. To enable third-party cookies, see the support page of the following browsers:
If you use Safari, disable "Prevent cross-site tracking".
Troubleshooting
If you experience issues trying to load the IDE, follow these steps:
- Check if you're using one of the supported browsers.
- Test a different supported browser.
- Enable cookies.
- Disable your browser add-ons.
- Check your anti-virus settings.
- Configure your network settings to use Google Public DNS.
- Firefox DNS-over-HTTPS
- DNS Encryption with DNS over HTTPs (DoH) on Chrome
- Microsoft Edge to have DNS over HTTPS (DoH) as the default DNS settings
- Set up 1.1.1.1 - macOS
- Check your internet connection and speed.
- Try to load the IDE with a different computer, tablet, or cell phone.
- Clear your browser cache, especially if you created your project before the new IDE (March 2022).
- Restart your computer and internet router.
The internet protection of some anti-virus products block the "Service Workers" that the IDE needs to operate. Kaspersky and Avast are the two products that commonly block the IDE from using Service Workers. These are background threads that improve the IDE's experience.
The DNS settings of some ISPs block Microsoft DNS, so some panels don't load and display the following message: "Server IP address could not be found".
The following resources explain how to change your networks settings:
Your browser may cache data from the old IDE.
You can also see our Videos. You can also get in touch with us via Discord.
Did you find this page helpful?