Writing Algorithms
Object Store
Introduction
The Object Store is a file system that you can use in your algorithms to save, read, and delete data. The Object Store is organization-specific, so you can save or read data from the same Object Store in all of your organization's projects. The Object Store works like a key-value storage system where you can store regular strings, JSON encoded strings, XML encoded strings, and bytes. You can access the data you store in the Object Store from backtests, the Research Environment, and live algorithms.
Get All Stored Data
To get all of the keys and values in the Object Store, iterate through the ObjectStoreobject_store property.
foreach (var kvp in ObjectStore)
{
    var key = kvp.Key;
    var value = kvp.Value;
}
for kvp in self.object_store:
key = kvp.key
value = kvp.value
To iterate through just the keys in the Object Store, iterate through the Keyskeys property.
foreach (var key in ObjectStore.Keys)
{
    continue;
}
for key in self.object_store.keys:
continue
Create Sample Data
You need some data to store data in the Object Store.
Follow these steps to create some sample data:
- Create a dictionary.
- Create a
string. - Create a
Bytesobject. - Convert the dictionary to an
XML-formatted object.
var dictSample = new Dictionary<string, int> { {"One", 1}, {"Two", 2}, {"Three", 3} };
var stringSample = "My string";
string_sample = "My string"
var bytesSample = Encoding.UTF8.GetBytes("My String"); bytes_sample = str.encode("My String")
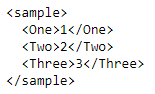
var xmlSample = new XElement("sample",
    dictSample.Select(kvp => new XElement(kvp.Key, kvp.Value)));
Log(xmlSample.ToString());
Save Data
The Object Store saves objects under a key-value system. If you save objects in backtests, you can access them from the Research Environment. To avoid slowing down your backtests, save data once in the OnEndOfAlgorithmon_end_of_algorithm event handler. In live trading, you can save data more frequently like at the end of a Traintrain method or after universe selection.
If you run algorithms in QuantConnect Cloud, you need storage create permissions to save data in the Object Store.
If you don't have data to store, create some sample data.
You can save the following types of objects in the Object Store:
Bytesobjectsstringobjects- JSON objects
- XML-formatted objects
You can save Bytes and string objects in the Object Store.
To store data, you need to provide a key. If you provide a key that is already in the Object Store, it will overwrite the data at that location. To avoid overwriting objects from other projects in your organization, prefix the key with your project ID. You can find the project ID in the URL of your browser when you open a project. For example, the ID of the project at quantconnect.com/project/12345 is 12345.
Strings
To save a string object, call the Savesave or SaveStringsave_string method.
var saveSuccessful = ObjectStore.Save($"{ProjectId}/stringKey", stringSample); save_successful = self.object_store.save(f"{self.project_id}/string_key", string_sample)
JSON
To save a JSON object, call the SaveJson<T> method. This method helps to serialize the data into JSON format.
var saveSuccessful = ObjectStore.SaveJson<Dictionary<string, int>>($"{ProjectId}/jsonKey", dictSample);
XML
To save an XML-formatted object, call the SaveXml<T> method.
var saveSuccessful = ObjectStore.SaveXml<XElement>($"{ProjectId}/xmlKey", xmlSample);
Bytes
To save a Bytes object (for example, zipped data), call the SaveBytessave_bytes method.
var saveSuccessful = ObjectStore.SaveBytes($"{ProjectId}/bytesKey", bytesSample)

var zippedDataSample = Compression.ZipBytes(Encoding.UTF8.GetBytes(stringSample), "data");
var saveSuccessful = ObjectStore.SaveBytes($"{ProjectId}/bytesKey.zip", zippedDataSample);
save_successful = self.object_store.save_bytes(f"{self.project_id}/bytes_key", bytes_sample)
zipped_data_sample = Compression.zip_bytes(bytes(string_sample, "utf-8"), "data")
zip_save_successful = self.object_store.save_bytes(f"{self.project_id}/bytesKey.zip", zipped_data_sample)
Read Data
Read data from the Object Store to import algorithm variables between deployments, import data from the Research Environment, or load trained machine learning models. To read data from the Object Store, you need to provide the key you used to store the object.
You can load the following types of objects from the Object Store:
Bytesobjectsstringobjects- JSON objects
- XML-formatted objects
You can load Bytes and string objects from the Object Store.
Before you read data from the Object Store, check if the key exists.
if (ObjectStore.ContainsKey(key))
{
    // Read data
}
if self.object_store.contains_key(key):
# Read data
Strings
To read a string object, call the Readread or ReadStringread_string method.
var stringData = ObjectStore.Read($"{ProjectId}/stringKey"); string_data = self.object_store.read(f"{self.project_id}/string_key")
JSON
To read a JSON object, call the ReadJson<T> method.
var jsonData = ObjectStore.ReadJson<Dictionary<string, int>>($"{ProjectId}/jsonKey");
XML
To read an XML-formatted object, call the ReadXml<T> method.
var xmlData = ObjectStore.ReadXml<XElement>($"{ProjectId}/xmlKey");
If you created the XML object from a dictionary, reconstruct the dictionary.
var dict = xmlData.Elements().ToDictionary(x => x.Name.LocalName, x => int.Parse(x.Value));
Bytes
To read a Bytes object, call the ReadBytesread_bytes method.
var bytesData = ObjectStore.ReadBytes($"{ProjectId}/bytesKey"); byte_data = self.object_store.read_bytes(f"{self.project_id}/bytes_key")
Delete Data
Delete objects in the Object Store to remove objects that you no longer need. If you run algorithms in QuantConnect Cloud, you need storage delete permissions to delete data from the Object Store.
To delete objects from the Object Store, call the Deletedelete method. Before you delete data, check if the key exists. If you try to delete an object with a key that doesn't exist in the Object Store, the method raises an exception.
if (ObjectStore.ContainsKey(key))
{
    ObjectStore.Delete(key);
}
if self.object_store.contains_key(key):
self.object_store.delete(key)
To delete all of the content in the Object Store, iterate through all the stored data.
foreach (var kvp in ObjectStore)
{
    ObjectStore.Delete(kvp.Key);
}
for kvp in self.object_store:
self.object_store.delete(kvp.key)
Cache Data
When you write to or read from the Object Store, the algorithm caches the data. The cache speeds up the algorithm execution because if you try to read the Object Store data again with the same key, it returns the cached data instead of downloading the data again. The cache speeds up execution, but it can cause problems if you are trying to share data between two nodes under the same Object Store key. For example, consider the following scenario:
- You open project A and save data under the key
123. - You open project B and save new data under the same key
123. - In project A, you read the Object Store data under the key
123, expecting the data from project B, but you get the original data you saved in step #1 instead.
You get the data from step 1 instead of step 2 because the cache contains the data from step 1.
To clear the cache, call the Clearclear method.
ObjectStore.Clear();
self.object_store.clear()
Get File Path
To get the file path for a specific key in the Object Store, call the GetFilePathget_file_path method. If the key you pass to the method doesn't already exist in the Object Store, it's added to the Object Store.
var filePath = ObjectStore.GetFilePath(key);
file_path = self.object_store.get_file_path(key)
Storage Quotas
If you run algorithms locally, you can store as much data as your hardware will allow. If you run algorithms in QuantConnect Cloud, you need a paid organization to access the Object Store and you must stay within your storage quota. To find your storage quota programmatically, use the MaxSize propertymax_size attribute for storage size and MaxFiles propertymax_files attribute for the maximum number of files.
var maxSize = ObjectStore.MaxSize;
var maxFiles = ObjectStore.MaxFiles;
max_size = self.object_store.max_size
max_files = self.object_store.max_files
If you need more storage space, edit your storage plan.
Example for DataFrames
Follow these steps to create a DataFrame, save it into the Object Store, and load it from the Object Store:
- Get some historical data.
- Create a DataFrame.
- Get the file path for a specific key in the Object Store.
- Call the SaveCsvto_csv method to save the DataFrame in the Object Store as a CSV file.
- Call the LoadCsvread_csv method to load the CSV file from the Object Store.
var spy = AddEquity("SPY").Symbol;
var history = History(Securities.Keys, 360, Resolution.Daily);
spy = self.add_equity("SPY").symbol
df = self.history(self.securities.keys, 360, Resolution.DAILY)
using Microsoft.Data.Analysis; //

var columns = new DataFrameColumn[] {
    new DateTimeDataFrameColumn("Time", history.Select(x => (DateTime)x[spy].EndTime)),
    new DecimalDataFrameColumn("SPY Open", history.Select(x => (decimal)x[spy].Open)),
    new DecimalDataFrameColumn("SPY High", history.Select(x => (decimal)x[spy].High)),
    new DecimalDataFrameColumn("SPY Low", history.Select(x => (decimal)x[spy].Low)),
    new DecimalDataFrameColumn("SPY Close", history.Select(x => (decimal)x[spy].Close))
};
var df = new DataFrame(columns);
var filePath = ObjectStore.GetFilePath("df_to_csv"); file_path = self.object_store.get_file_path("df_to_csv")
DataFrame.SaveCsv(df, filePath); // File size: 26520 bytes
df.to_csv(file_path) # File size: 32721 bytes
var reread = DataFrame.LoadCsv(filePath);
reread = pd.read_csv(file_path)
pandas supports saving and loading DataFrame objects in the following additional formats:
- XML
- JSON
- Parquet
- Pickle
file_path = self.object_store.get_file_path("df_to_xml")
df.to_xml(file_path)   # File size: 87816 bytes
reread = pd.read_xml(file_path)
file_path = self.object_store.get_file_path("df_to_json")
df.to_json(file_path)   # File size: 125250 bytes
reread = pd.read_json(file_path)
file_path = self.object_store.get_file_path("df_to_parquet")
df.to_parquet(file_path)   # File size: 23996 bytes
reread = pd.read_parquet(file_path)
file_path = self.object_store.get_file_path("df_to_pickle")
df.to_pickle(file_path)   # File size: 19868 bytes
reread = pd.read_pickle(file_path)
Example for Plotting
You can use the Object Store to plot data from your backtests and live algorithm in the Research Environment. The following example demonstrates how to plot a Simple Moving Average indicator that's generated during a backtest.
- Create a algorithm, add a data subscription, and add a simple moving average indicator.
- Save the indicator data as
stringin_contentself._content. - In the OnEndOfAlgorithm method, save the indicator data to the Object Store.
- Open the Research Environment and create a
QuantBook. - Read the indicator data from the Object Store.
- Convert the data to a pandas object and create a chart.
- Import the
Plotly.NETandPlotly.NET.LayoutObjectspackages. - Create the
Layoutobject and set thetitle,xaxis, andyaxisproperties. - Convert the data to a list of
DateTimeobjects for the chart x-axis and a list ofdecimalobjects for the chart y-axis, then create aChart2D.Chart.Lineobject with the data. - Apply the layout to the
Lineobject and display the chart.
public class ObjectStoreChartingAlgorithm : QCAlgorithm
{
    private SimpleMovingAverage _sma;
    private string _content;

    public override void Initialize()
    {
        AddEquity("SPY", Resolution.Minute);
        _sma = SMA("SPY", 22);
    }
}
class ObjectStoreChartingAlgorithm(QCAlgorithm):
def initialize(self):
self.add_equity("SPY")
self._content = ''
self._sma = self.sma("SPY", 22)
The algorithm will save _contentself._content to the Object Store.
public override void OnData(Slice data)
{
    _content += $"{_sma.Current.EndTime},{_sma}\n";
}
def on_data(self, data: Slice):
self.plot('SMA', 'Value', self._sma.current.value)
self._content += f'{self._sma.current.end_time},{self._sma.current.value}\n'
public override void OnEndOfAlgorithm()
{
    ObjectStore.Save("sma_values_csharp", _content);
}
def on_end_of_algorithm(self):
self.object_store.save('sma_values_python', self._content)
// Execute the following command in first
#load "../Initialize.csx"
// Load the necessary assembly files.
#load "../QuantConnect.csx"
using QuantConnect;
using QuantConnect.Research;

var qb = new QuantBook();
qb = QuantBook()
var content = qb.ObjectStore.Read("sma_values_csharp"); content = qb.object_store.read("sma_values_python")
The key you provide must be the same key you used to save the object.
data = {}
for line in content.split('\n'):
    csv = line.split(',')
    if len(csv) > 1:
        data[csv[0]] = float(csv[1])

series = pd.Series(data, index=data.keys())
series.plot()
#r "nuget: Plotly.NET"
#r "nuget: Plotly.NET.Interactive"
using Plotly.NET;
using Plotly.NET.Interactive;
using Plotly.NET.LayoutObjects;
var layout = new Layout();
layout.SetValue("title", Title.init("SMA"));

var xAxis = new LinearAxis();
xAxis.SetValue("title", "Time");
layout.SetValue("xaxis", xAxis);

var yAxis = new LinearAxis();
yAxis.SetValue("title", "SMA");
layout.SetValue("yaxis", yAxis);
var index = new List<DateTimee>();
var values = new List<decimal>();

foreach (var line in content.Split('\n'))
{
    var csv = line.Split(',');
    if (csv.Length > 1)
    {
        index.Add(Parse.DateTime(csv[0]));
        values.Add(decimal.Parse(csv[1]));
    }
}

var chart = Chart2D.Chart.Linee<DateTime, decimal, stringe>(index, values);
chart.WithLayout(layout);
display(chart);
public class ObjectStoreChartingAlgorithm : QCAlgorithm
{
    private SimpleMovingAverage _sma;
    private string _content;

    public override void Initialize()
    {
        SetStartDate(2024, 9, 1);
        SetEndDate(2024, 12, 31);
        SetCash(100000);

        AddEquity("SPY", Resolution.Minute);
        // Create SMA indicator for referencing.
        _sma = SMA("SPY", 22);
    }

    public override void OnData(Slice data)
    {
        // Cache the indicator data point to save it.
        _content += $"{_sma.Current.EndTime},{_sma}\n";
    }

    public override void OnEndOfAlgorithm()
    {
        // Save the indicator values to object store for logging.
        ObjectStore.Save("sma_values_csharp", _content);
    }
}
class ObjectStoreChartingAlgorithm(QCAlgorithm):
def initialize(self) -> None:
self.set_start_date(2024, 9, 1)
self.set_end_date(2024, 12, 31)
self.set_cash(100000)
self.add_equity("SPY", Resolution.MINUTE)
self._content = ''
# Create SMA indicator for referencing.
self._sma = self.sma("SPY", 22)
def on_data(self, data: Slice) -> None:
# Cache the indicator data point to save it.
self._content += f'{self._sma.current.end_time},{self._sma.current.value}\n'
def on_end_of_algorithm(self) -> None:
# Save the indicator values to object store for logging.
self.object_store.save('sma_values_python', self._content)
Example for Logging
You can use the Object Store to log order data from your backtests and live algorithms, then analyze it in the Research Environment. The following example demonstrates how to log orders from an Exponential Moving Average (EMA) cross strategy to a text file in the Object Store.
- Create an algorithm, add a daily equity subscription, and create two EMA indicators.
- In the
OnDataon_datamethod, place market orders when the EMAs cross. - In the
OnOrderEventon_order_eventmethod, log each fill to the content string. - In the OnEndOfAlgorithm method, save the content to the Object Store.
- Open the Research Environment and create a
QuantBook. - Read the data from the Object Store.
- Split the content into lines.
- Parse the content into a list of string arrays.
- Display the first few rows (head) and last few rows (tail).
- Display the first few rows (head) and last few rows (tail).
- Search for all rows tagged as "BUY".
- Search for all rows tagged as "BUY".
public class ObjectStoreLoggingAlgorithm : QCAlgorithm
{
    private ExponentialMovingAverage _emaShort;
    private ExponentialMovingAverage _emaLong;
    private Symbol _symbol;
    private string _content;

    public override void Initialize()
    {
        _symbol = AddEquity("SPY", Resolution.Daily).Symbol;
        _emaShort = EMA(_symbol, 10);
        _emaLong = EMA(_symbol, 30);
        // Add a header row.
        _content = "Time,Symbol,Price,Quantity,Tag\n";
    }
}
class ObjectStoreLoggingAlgorithm(QCAlgorithm):
def initialize(self):
self._symbol = self.add_equity("SPY", Resolution.DAILY).symbol
self._ema_short = self.ema(self._symbol, 10)
self._ema_long = self.ema(self._symbol, 30)
# Add a header row.
self._content = 'Time,Symbol,Price,Quantity,Tag\n'
The algorithm saves _contentself._content to the Object Store at the end of the backtest.
public override void OnData(Slice data)
{
    if (!_emaShort.IsReady || !_emaLong.IsReady) return;

    if (_emaShort > _emaLong && !Portfolio[_symbol].IsLong)
    {
        MarketOrder(_symbol, 100, tag: $"BUY: ema-short: {_emaShort:F4} > ema-long: {_emaLong:F4}");
    }
    else if (_emaShort < _emaLong && !Portfolio[_symbol].IsShort)
    {
        MarketOrder(_symbol, -100, tag: $"SELL: ema-short: {_emaShort:F4} < ema-long: {_emaLong:F4}");
    }
}
def on_data(self, data: Slice):
if not self._ema_short.is_ready or not self._ema_long.is_ready:
return
ema_short = self._ema_short.current.value
ema_long = self._ema_long.current.value
if ema_short > ema_long and not self.portfolio[self._symbol].is_long:
self.market_order(self._symbol, 100, tag=f'BUY: ema-short: {ema_short:.4f} > ema-long: {ema_long:.4f}')
elif ema_short < ema_long and not self.portfolio[self._symbol].is_short:
self.market_order(self._symbol, -100, tag=f'SELL: ema-short: {ema_short:.4f} < ema-long: {ema_long:.4f}')
public override void OnOrderEvent(OrderEvent orderEvent)
{
    if (orderEvent.Status != OrderStatus.Filled) return;

    _content += $"{orderEvent.UtcTime:yyyy-MM-dd},{orderEvent.Symbol},{orderEvent.FillPrice}," +
        $"{orderEvent.FillQuantity},{orderEvent.Ticket.Tag}\n";
}
def on_order_event(self, order_event: OrderEvent):
if order_event.status != OrderStatus.FILLED:
return
self._content += (
f'{order_event.utc_time.strftime("%Y-%m-%d")},'
f'{order_event.symbol},'
f'{order_event.fill_price},'
f'{order_event.fill_quantity},'
f'{order_event.ticket.tag}\n'
)
public override void OnEndOfAlgorithm()
{
    var key = $"{ProjectId}-{AlgorithmId}.txt";
    ObjectStore.Save(key, _content);
    Log($"Saved order log to Object Store: {key}");
}
def on_end_of_algorithm(self):
key = f'{self.project_id}-{self.algorithm_id}.txt'
self.object_store.save(key, self._content)
self.log(f'Saved order log to Object Store: {key}')
// Execute the following command in first
#load "../Initialize.csx"
// Load the necessary assembly files.
#load "../QuantConnect.csx"
using QuantConnect;
using QuantConnect.Research;

var qb = new QuantBook();
qb = QuantBook()
// Replace the key with the one from your backtest log.
var content = qb.ObjectStore.Read("<project-id>-<algorithm-id>.txt");
# Replace the key with the one from your backtest log.
content = qb.object_store.read("<project-id>-<algorithm-id>.txt")
The key you provide must be the same key you used to save the object. Check the backtest log for the exact key.
lines = content.strip().split('\n')
# Display the header.
print(lines[0])
var lines = content.Split('\n')
    .Where(line => !string.IsNullOrWhiteSpace(line))
    .Select(line => line.Split(','))
    .ToList();

// Display the header row.
var header = lines.First();
Console.WriteLine(string.Join(" | ", header));
# Show the first 5 data rows.
for line in lines[1:6]:
    print(line)

# Show the last 5 data rows.
for line in lines[-5:]:
    print(line)
// Skip the header, then take the first 5 data rows.
var dataRows = lines.Skip(1).ToList();
Console.WriteLine("Head:");
foreach (var row in dataRows.Take(5))
{
    Console.WriteLine(string.Join(" | ", row));
}

// Show the last 5 data rows.
Console.WriteLine("\nTail:");
foreach (var row in dataRows.TakeLast(5))
{
    Console.WriteLine(string.Join(" | ", row));
}
# Filter lines that contain "BUY".
buy_orders = [line for line in lines[1:] if 'BUY' in line]
for line in buy_orders:
    print(line)
// Filter rows where Tag contains "BUY".
var buyOrders = dataRows
    .Where(row => row.Length > 4 && row[4].Contains("BUY"))
    .ToList();

Console.WriteLine("Buy Orders:");
foreach (var row in buyOrders)
{
    Console.WriteLine(string.Join(" | ", row));
}
public class ObjectStoreLoggingAlgorithm : QCAlgorithm
{
    private ExponentialMovingAverage _emaShort;
    private ExponentialMovingAverage _emaLong;
    private Symbol _symbol;
    private string _content;

    public override void Initialize()
    {
        SetStartDate(2024, 1, 1);
        SetEndDate(2024, 12, 31);
        SetCash(100000);

        _symbol = AddEquity("SPY", Resolution.Daily).Symbol;
        // Create short and long EMA indicators.
        _emaShort = EMA(_symbol, 10);
        _emaLong = EMA(_symbol, 30);
        // Add a header row.
        _content = "Time,Symbol,Price,Quantity,Tag\n";
    }

    public override void OnData(Slice data)
    {
        if (!_emaShort.IsReady || !_emaLong.IsReady) return;

        // Place a market order when the EMAs cross.
        if (_emaShort > _emaLong && !Portfolio[_symbol].IsLong)
        {
            MarketOrder(_symbol, 100, tag: $"BUY: ema-short: {_emaShort:F4} > ema-long: {_emaLong:F4}");
        }
        else if (_emaShort < _emaLong && !Portfolio[_symbol].IsShort)
        {
            MarketOrder(_symbol, -100, tag: $"SELL: ema-short: {_emaShort:F4} < ema-long: {_emaLong:F4}");
        }
    }

    public override void OnOrderEvent(OrderEvent orderEvent)
    {
        if (orderEvent.Status != OrderStatus.Filled) return;

        // Log each fill as a row.
        _content += $"{orderEvent.UtcTime:yyyy-MM-dd},{orderEvent.Symbol},{orderEvent.FillPrice}," +
            $"{orderEvent.FillQuantity},{orderEvent.Ticket.Tag}\n";
    }

    public override void OnEndOfAlgorithm()
    {
        // Save the order log to the Object Store.
        var key = $"{ProjectId}-{AlgorithmId}.txt";
        ObjectStore.Save(key, _content);
        Log($"Saved order log to Object Store: {key}");
    }
}
class ObjectStoreLoggingAlgorithm(QCAlgorithm):
def initialize(self) -> None:
self.set_start_date(2024, 1, 1)
self.set_end_date(2024, 12, 31)
self.set_cash(100000)
self._symbol = self.add_equity("SPY", Resolution.DAILY).symbol
# Create short and long EMA indicators.
self._ema_short = self.ema(self._symbol, 10)
self._ema_long = self.ema(self._symbol, 30)
# Add a header row.
self._content = 'Time,Symbol,Price,Quantity,Tag\n'
def on_data(self, data: Slice) -> None:
if not self._ema_short.is_ready or not self._ema_long.is_ready:
return
# Place a market order when the EMAs cross.
ema_short = self._ema_short.current.value
ema_long = self._ema_long.current.value
if ema_short > ema_long and not self.portfolio[self._symbol].is_long:
self.market_order(self._symbol, 100, tag=f'BUY: ema-short: {ema_short:.4f} > ema-long: {ema_long:.4f}')
elif ema_short < ema_long and not self.portfolio[self._symbol].is_short:
self.market_order(self._symbol, -100, tag=f'SELL: ema-short: {ema_short:.4f} < ema-long: {ema_long:.4f}')
def on_order_event(self, order_event: OrderEvent) -> None:
if order_event.status != OrderStatus.FILLED:
return
# Log each fill as a row.
self._content += (
f'{order_event.utc_time.strftime("%Y-%m-%d")},'
f'{order_event.symbol},'
f'{order_event.fill_price},'
f'{order_event.fill_quantity},'
f'{order_event.ticket.tag}\n'
)
def on_end_of_algorithm(self) -> None:
# Save the order log to the Object Store.
key = f'{self.project_id}-{self.algorithm_id}.txt'
self.object_store.save(key, self._content)
self.log(f'Saved order log to Object Store: {key}')
Example of Custom Data
Follow these steps to use the Object Store as a data source for custom data:
- Create a custom data class that defines a storage key and implements the
GetSourceget_sourcemethod. - Create an algorithm that downloads data from an external source and saves it to the Object Store.
- Call the
AddDataadd_datamethod to subscribe to the custom type. - Implement the
Readerreadermethod for the custom data class. - To confirm your algorithm is receiving the custom data, request some historical data, then log and plot the data from the
Sliceobject.
public class Bitstamp : TradeBar
{
    public static string KEY = "bitstampusd.csv";

    public override SubscriptionDataSource GetSource(SubscriptionDataConfig config, DateTime date, bool isLiveMode)
    {
        return new SubscriptionDataSource(KEY, SubscriptionTransportMedium.ObjectStore);
    }
}
class Bitstamp(PythonData):
KEY = 'bitstampusd.csv'
def get_source(self, config, date, isLiveMode):
return SubscriptionDataSource(Bitstamp.KEY, SubscriptionTransportMedium.OBJECT_STORE)
public class ObjectStoreCustomDataAlgorithm : QCAlgorithm
{
    public override void Initialize()
    {
        if (!ObjectStore.ContainsKey(Bitstamp.KEY))
        {
            var url = "https://raw.githubusercontent.com/QuantConnect/Documentation/master/Resources/datasets/custom-data/bitstampusd.csv";
            var content = Download(url);
            ObjectStore.Save(Bitstamp.KEY, content);
        }
    }
}
class ObjectStoreCustomDataAlgorithm(QCAlgorithm):
def initialize(self):
if not self.object_store.contains_key(Bitstamp.KEY):
url = "https://raw.githubusercontent.com/QuantConnect/Documentation/master/Resources/datasets/custom-data/bitstampusd.csv"
content = self.download(url)
self.object_store.save(Bitstamp.KEY, content)
public class ObjectStoreCustomDataAlgorithm : QCAlgorithm
{
    private Symbol _customDataSymbol;
    public override void Initialize()
    {
        _customDataSymbol = AddData<Bitstamp>("BTC").Symbol;
    }
}
class ObjectStoreCustomDataAlgorithm(QCAlgorithm):
def initialize(self):
self.custom_data_symbol = self.add_data(Bitstamp, "BTC").symbol
public class Bitstamp : TradeBar
{
    public override BaseData Reader(SubscriptionDataConfig config, string line, DateTime date, bool isLiveMode)
    {
        //Example Line Format:
        //Date      Open   High    Low     Close   Volume (BTC)    Volume (Currency)   Weighted Price
        //2011-09-13 5.8    6.0     5.65    5.97    58.37138238,    346.0973893944      5.929230648356
        if (!char.IsDigit(line.Trim()[0]))
        {
            return null;
        }

        var coin = new Bitstamp() {Symbol = config.Symbol};

        var data = line.Split(',');
        coin.Value = data[4].IfNotNullOrEmpty(s => decimal.Parse(s, NumberStyles.Any, CultureInfo.InvariantCulture));
        if (coin.Value == 0)
        {
            return null;
        }

        coin.Time = DateTime.Parse(data[0], CultureInfo.InvariantCulture);
        coin.EndTime = coin.Time.AddDays(1);
        coin.Open = data[1].IfNotNullOrEmpty(s => decimal.Parse(s, NumberStyles.Any, CultureInfo.InvariantCulture));
        coin.High = data[2].IfNotNullOrEmpty(s => decimal.Parse(s, NumberStyles.Any, CultureInfo.InvariantCulture));
        coin.Low = data[3].IfNotNullOrEmpty(s => decimal.Parse(s, NumberStyles.Any, CultureInfo.InvariantCulture));
        coin.VolumeBTC = data[5].IfNotNullOrEmpty(s => decimal.Parse(s, NumberStyles.Any, CultureInfo.InvariantCulture));
        coin.Volume = data[6].IfNotNullOrEmpty(s => decimal.Parse(s, NumberStyles.Any, CultureInfo.InvariantCulture));
        coin.WeightedPrice = data[7].IfNotNullOrEmpty(s => decimal.Parse(s, NumberStyles.Any, CultureInfo.InvariantCulture));
        coin.Close = coin.Value;
        return coin;
    }
}
class Bitstamp(PythonData):
def reader(self, config, line, date, isLiveMode):
# Example Line Format:
# Date Open High Low Close Volume (BTC) Volume (Currency) Weighted Price
# 2011-09-13 5.8 6.0 5.65 5.97 58.37138238, 346.0973893944 5.929230648356
if not line[0].isdigit():
return None
coin = Bitstamp()
coin.symbol = config.symbol
data = line.split(',')
# If value is zero, return None
coin.value = float(data[4])
if coin.value == 0:
return None
coin.time = datetime.strptime(data[0], "%Y-%m-%d")
coin.end_time = coin.time + timedelta(1)
coin["Open"] = float(data[1])
coin["High"] = float(data[2])
coin["Low"] = float(data[3])
coin["Close"] = coin.value
coin["VolumeBTC"] = float(data[5])
coin["VolumeUSD"] = float(data[6])
coin["WeightedPrice"] = float(data[7])
return coin
public class ObjectStoreCustomDataAlgorithm : QCAlgorithm
{
    public override void Initialize()
    {
        var history = History(_customDataSymbol, 200, Resolution.Daily);
        Debug($"We got {history.Count()} items from historical data request of {_customDataSymbol}.");
    }
    public void OnData(Bitstamp data)
    {
        Log($"{data.EndTime}: Close: {data.Close}");
        Plot(_customDataSymbol, "Price", data.Close);
    }
}
class ObjectStoreCustomDataAlgorithm(QCAlgorithm):
def initialize(self):
history = self.history(Bitstamp, self.custom_data_symbol, 200, Resolution.DAILY)
self.debug(f"We got {len(history)} items from historical data request of {self.custom_data_symbol}.")
def on_data(self, slice):
data = slice.get(Bitstamp).get( self.custom_data_symbol)
if not data:
return
self.log(f'{data.end_time}: Close: {data.close}')
self.plot(self.custom_data_symbol, 'Price', data.close)
The following algorithm provides a full example of a sourcing custom data from the Object Store:
public class CustomDataBitstampAlgorithm : QCAlgorithm
{
    private Symbol _customDataSymbol;

    public override void Initialize()
    {
        SetStartDate(2012, 9, 13);
        SetEndDate(2021, 6, 20);

        // Load the custom data from ObjectStore.
        if (!ObjectStore.ContainsKey(Bitstamp.KEY))
        {
            var url = "https://raw.githubusercontent.com/QuantConnect/Documentation/master/Resources/datasets/custom-data/bitstampusd.csv";
            var content = Download(url);
            ObjectStore.Save(Bitstamp.KEY, content);
        }

        // Request custom data for plotting.
        // Define the symbol and "type" of our generic data.
        _customDataSymbol = AddData<Bitstamp>("BTC", Resolution.Daily).Symbol;

        // Example historical call.
        var history = History(_customDataSymbol, 200, Resolution.Daily);
        Debug($"We got {history.Count()} items from historical data request of {_customDataSymbol}.");
    }

    public void OnData(Bitstamp data)
    {
        // Plot on updated data.
        Log($"{data.EndTime}: Close: {data.Close}");
        Plot(_customDataSymbol, "Price", data.Close);
    }

    public class Bitstamp : TradeBar
    {
        public static string KEY = "bitstampusd.csv";

        public override SubscriptionDataSource GetSource(SubscriptionDataConfig config, DateTime date, bool isLiveMode)
        {
            // Load data from object store.
            return new SubscriptionDataSource(KEY, SubscriptionTransportMedium.ObjectStore);
        }

        public decimal WeightedPrice = 0;
        public decimal VolumeBTC = 0;

        public override BaseData Reader(SubscriptionDataConfig config, string line, DateTime date, bool isLiveMode)
        {
            //Example Line Format:
            //Date      Open   High    Low     Close   Volume (BTC)    Volume (Currency)   Weighted Price
            //2011-09-13 5.8    6.0     5.65    5.97    58.37138238,    346.0973893944      5.929230648356
            if (!char.IsDigit(line.Trim()[0]))
            {
                return null;
            }

            var coin = new Bitstamp() {Symbol = config.Symbol};

            var data = line.Split(',');
            coin.Value = data[4].IfNotNullOrEmpty(s => decimal.Parse(s, NumberStyles.Any, CultureInfo.InvariantCulture));
            if (coin.Value == 0)
            {
                return null;
            }

            coin.Time = DateTime.Parse(data[0], CultureInfo.InvariantCulture);
            coin.EndTime = coin.Time.AddDays(1);
            coin.Open = data[1].IfNotNullOrEmpty(s => decimal.Parse(s, NumberStyles.Any, CultureInfo.InvariantCulture));
            coin.High = data[2].IfNotNullOrEmpty(s => decimal.Parse(s, NumberStyles.Any, CultureInfo.InvariantCulture));
            coin.Low = data[3].IfNotNullOrEmpty(s => decimal.Parse(s, NumberStyles.Any, CultureInfo.InvariantCulture));
            coin.VolumeBTC = data[5].IfNotNullOrEmpty(s => decimal.Parse(s, NumberStyles.Any, CultureInfo.InvariantCulture));
            coin.Volume = data[6].IfNotNullOrEmpty(s => decimal.Parse(s, NumberStyles.Any, CultureInfo.InvariantCulture));
            coin.WeightedPrice = data[7].IfNotNullOrEmpty(s => decimal.Parse(s, NumberStyles.Any, CultureInfo.InvariantCulture));
            coin.Close = coin.Value;
            return coin;
        }
    }
}
class ObjectStoreCustomDataAlgorithm(QCAlgorithm):
def initialize(self) -> None:
self.set_start_date(2012, 9, 13)
self.set_end_date(2021, 6, 20)
self.set_cash(100000)
# Load the custom data from ObjectStore.
if not self.object_store.contains_key(Bitstamp.KEY):
url = "https://raw.githubusercontent.com/QuantConnect/Documentation/master/Resources/datasets/custom-data/bitstampusd.csv"
content = self.download(url)
self.object_store.save(Bitstamp.KEY, content)
# Request custom data for plotting.
# Define the symbol and "type" of our generic data.
self.custom_data_symbol = self.add_data(Bitstamp, "BTC").symbol
# Example historical call.
history = self.history(Bitstamp, self.custom_data_symbol, 200, Resolution.DAILY)
self.debug(f"We got {len(history)} items from historical data request of {self.custom_data_symbol}.")
def on_data(self, slice: Slice) -> None:
# Plot on updated data.
data = slice.get(Bitstamp).get(self.custom_data_symbol)
if not data:
return
self.log(f'{data.end_time}: Close: {data.close}')
self.plot(self.custom_data_symbol, 'Price', data.close)
class Bitstamp(PythonData):
KEY = 'bitstampusd.csv'
def get_source(self, config, date, isLiveMode):
# Load data from object store.
return SubscriptionDataSource(Bitstamp.KEY, SubscriptionTransportMedium.OBJECT_STORE)
def reader(self, config, line, date, isLiveMode):
# Example Line Format:
# Date Open High Low Close Volume (BTC) Volume (Currency) Weighted Price
# 2011-09-13 5.8 6.0 5.65 5.97 58.37138238, 346.0973893944 5.929230648356
if not line[0].isdigit():
return None
coin = Bitstamp()
coin.symbol = config.symbol
data = line.split(',')
# If value is zero, return None
coin.value = float(data[4])
if coin.value == 0:
return None
coin.time = datetime.strptime(data[0], "%Y-%m-%d")
coin.end_time = coin.time + timedelta(1)
coin["Open"] = float(data[1])
coin["High"] = float(data[2])
coin["Low"] = float(data[3])
coin["Close"] = coin.value
coin["VolumeBTC"] = float(data[5])
coin["VolumeUSD"] = float(data[6])
coin["WeightedPrice"] = float(data[7])
return coin
Preserve Insights Between Deployments
Follow these steps to use the Object Store to preserve the algorithm state across live deployments:
- Create an algorithm that defines a storage key and adds insights to the Insight Manager.
- At the top of the algorithm file, add the following imports:
- In the OnEndOfAlgorithmon_end_of_algorithm event handler of the algorithm, get the Insight objects and save them in the Object Store as a JSON object.
- At the bottom of the
Initializeinitializemethod, read the Insight objects from the Object Store and add them to the Insight Manager.
public class ObjectStoreChartingAlgorithm : QCAlgorithm
{
    private string _insightKey;
    public override void Initialize()
    {
        _insightKey = $"{ProjectId}/insights";
        SetUniverseSelection(new ManualUniverseSelectionModel(QuantConnect.Symbol.Create("SPY", SecurityType.Equity, Market.USA)));
        SetAlpha(new ConstantAlphaModel(InsightType.Price, InsightDirection.Up, TimeSpan.FromDays(5), 0.025, null));
    }
}
class ObjectStoreChartingAlgorithm(QCAlgorithm):
def initialize(self):
self.insight_key = f"{self.project_id}/insights"
self.set_universe_selection(ManualUniverseSelectionModel([ Symbol.create("SPY", SecurityType.EQUITY, Market.USA) ]))
self.set_alpha(ConstantAlphaModel(InsightType.PRICE, InsightDirection.UP, timedelta(5), 0.025, None))
from Newtonsoft.Json import JsonConvert
from System.Collections.Generic import List
Insight objects are C# objects, so you need the preceding C# libraries to serialize and deserialize them.
public override void OnEndOfAlgorithm()
{
    var insights = Insights.GetInsights(x => x.IsActive(UtcTime));
    ObjectStore.SaveJson(_insightKey, insights);
}
def on_end_of_algorithm(self):
insights = self.insights.get_insights(lambda x: x.is_active(self.utc_time))
content = ','.join([JsonConvert.SerializeObject(x) for x in insights])
self.object_store.save(self.insight_key, f'[{content}]')
if (ObjectStore.ContainsKey(_insightKey))
{
    var insights = ObjectStore.ReadJson<List<Insight>>(_insightKey);
    Insights.AddRange(insights);
}
if self.object_store.contains_key(self.insight_key):
insights = JsonConvert.DeserializeObject[List[Insight]](
self.object_store.read(self.insights_key)
)
self.insights.add_range(insights)
The following algorithm provides a full example of preserving the Insight state between deployments:
public class ObjectStoreInsightsAlgorithm : QCAlgorithm
{
    private string _insightsKey = "insights";

    public override void Initialize()
    {
        UniverseSettings.Resolution = Resolution.Daily;

        SetStartDate(2024, 9, 1);
        SetEndDate(2024, 12, 31);
        SetCash(100000);

        _insightsKey = $"{ProjectId}/{_insightsKey}";

        // Read the file with the insights
        if (ObjectStore.ContainsKey(_insightsKey))
        {
            // Load cached JSON key value pair from object store, then add to algorithm insights.
            var insights = ObjectStore.ReadJson<List<Insight>>(_insightsKey);
            Log($"Read {insights.Count} insight(s) from the Object Store");
            Insights.AddRange(insights);

            // Delete the key to reuse it
            ObjectStore.Delete(_insightsKey);
        }

        SetUniverseSelection(new ManualUniverseSelectionModel(QuantConnect.Symbol.Create("SPY", SecurityType.Equity, Market.USA)));
        SetAlpha(new ConstantAlphaModel(InsightType.Price, InsightDirection.Up, TimeSpan.FromDays(5), 0.025, null));
        SetPortfolioConstruction(new EqualWeightingPortfolioConstructionModel(Resolution.Daily));
    }

    public override void OnEndOfAlgorithm()
    {
        // Get all active insights.
        var insights = Insights.GetInsights(x => x.IsActive(UtcTime));
        // If we want to save all insights (expired and active), we can use.
        // var insights = Insights.GetInsights(x => true);
        Log($"Save {insights.Count} insight(s) to the Object Store.");
        ObjectStore.SaveJson(_insightsKey, insights);
    }
}
from Newtonsoft.Json import JsonConvert
from System.Collections.Generic import List
class ObjectStoreInsightsAlgorithm(QCAlgorithm):
def initialize(self) -> None:
self.universe_settings.resolution = Resolution.DAILY
self.set_start_date(2024, 9, 1)
self.set_end_date(2024, 12, 31)
self.set_cash(100000)
self.insights_key = f"{self.project_id}/insights"
# Read the file with the insights
if self.object_store.contains_key(self.insights_key):
# Load cached JSON key value pair from object store, then add to algorithm insights.
insights = JsonConvert.DeserializeObject[List[Insight]](
self.object_store.read(self.insights_key)
)
self.log(f"Read {len(insights)} insight(s) from the Object Store")
self.insights.add_range(insights)
# Delete the key to reuse it
self.object_store.delete(self.insights_key)
self.set_universe_selection(ManualUniverseSelectionModel([ Symbol.create("SPY", SecurityType.EQUITY, Market.USA) ]))
self.set_alpha(ConstantAlphaModel(InsightType.PRICE, InsightDirection.UP, timedelta(5), 0.025, None))
self.set_portfolio_construction(EqualWeightingPortfolioConstructionModel(Resolution.DAILY))
def on_end_of_algorithm(self) -> None:
# Get all active insights.
insights = self.insights.get_insights(lambda x: x.is_active(self.utc_time))
# If we want to save all insights (expired and active), we can use
# insights = self.insights.get_insights(lambda x: True)
self.log(f"Save {len(insights)} insight(s) to the Object Store.")
content = ','.join([JsonConvert.SerializeObject(x) for x in insights])
self.object_store.save(self.insights_key, f'[{content}]')
Live Trading Considerations
If you update the Object Store from outside of your live trading node and then try to read the new content from inside your live trading algorithm, you may not get the new content because the Object Store caches data to speed up execution. To ensure you get the latest value for a specific key in the Object Store, clear the cache and then read the data.
ObjectStore.Clear();
if (ObjectStore.ContainsKey(key))
{
    var value = ObjectStore.Read(key);
}
self.object_store.clear()
if self.object_store.contains_key(key):
value = self.object_store.read(key)
Special Folders
Your organization's Object Store includes a reserved .assistant folder that the QuantConnect AI assistants read. It holds the custom skills, memories, and templates you define for your organization, which let the assistants apply your own expertise, remember your preferences, and start new projects from your own scaffolds.
The .assistant folder contains the following subfolders:
| Subfolder | Purpose |
|---|---|
| skills | Reusable instructions and conventions the assistants apply. |
| memories | Facts the assistants remember across conversations. |
| templates | Your own project scaffolds for the assistants to initialize for new projects. |
These files are shared across your organization. For information on uploading files to the Object Store, see the documentation for the Algorithm Lab, CLI, or API.
You can also see our Videos. You can also get in touch with us via Discord.
Did you find this page helpful?